Kumara vines spread some distance, mine travel more than 3m. Some thought needs tobe madeon the location fora good sized Kumara patch.
A sunny spot with access to water is ideal, and away from the sheep.My second season was almost wiped out when our sheep found the Kumara patch and ate the vines down to the ground.
Unlike New Zealand central France can get very dry and Kumara need moisture to do well.
I tried growing Kumara in a mixture of straw and hot composted sheep manure, this method may workfor potatoes but not Kumara. My conclusion is Kumara need dirt.
The best Kumara that I have grown is where the top 30cm of soil is free, fertile and moist. Below the 30cm a firmer soil helps the Kumara to develop and you don't dig as far to find your harvest.
I have incorporated over several seasons a large amount of hot composted manure and straw into this top 30cm.
My polytunnel is 150m^2 and has had 18 tonne of compost added, and I will continue adding in the coming seasons. Hot composting makes fantastic soil, which now is full of worms.
If you study the photo you will see biochar addition. I made my own in a charcoalpit, activated with steam, and soaked in manure tea for several weeks. This reduces nitrogen draw when initially adding biochar.
I have practiced rotating the crop position each year, but unsure if this is completely neccessary. Ensure the soil gets enough water prior to planting, so it is moist to depth and it has warmed up. Rule of thumb is, if you sit on the soil for some time its warm enough.
Provided no frosts come, cooler nights will stop growth and the leaves may see a slight purple edge. Don't worry the plants will takeoff when the temperature is right.
Slips in your sandbox will grow amazingly fast and harvesting can be done a couple of times per week.
The slips which are 15 to 20cm long should either be twisted off if they are growing on top of the Kumara, or gently pulled from the Kumara with increasing force if growing from beneath the sand.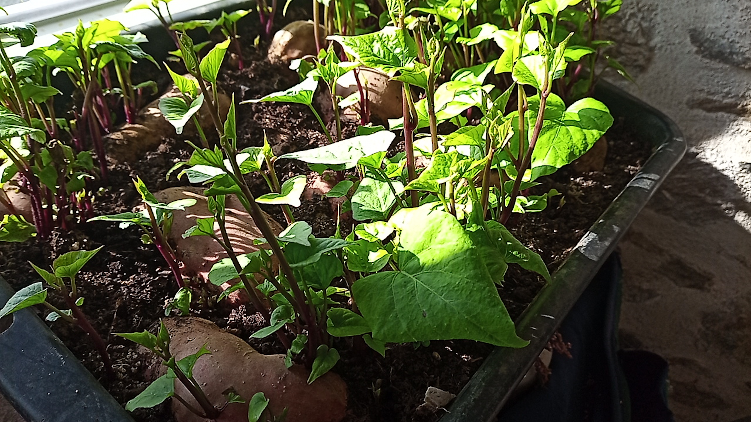
Often it is neccessary to place a finger onto the Kumara as not to dislodge it from its bed. Some slips from beneath the bed will have a good amount of roots.
You will get a mixture of slips with and without roots, and it is important to grown them on before planting.
I pretty sure in a warm climate this step could be eliminated, ensuring slips have new root growth before they are planted out gives them a head start.
That head start is required if you get some unfavourable temperatures. I have found following this method gives a very high success rate.
I have had only five or six slips from several hundred not survive.
The harvested slips need a good chance in life, and placing them in 1 cm of water (warm) inside a coloured container is recommended. The roots need to be dark and a clear container inhibits this root growth. I think this is why the toothpick method doesn't yield as high.
Place the container in a grow house on heat pads and under growlights. At 24 Degrees C it takes about 10 days for the roots to develop.
I tried adding a weak soution of liquid feeder to the water, don't it madethe water go anerobic very quickly and the roots died. I recommend adding spring water or tap water leftin the sun for a few days.
A good slip will have multiple sites of root development along its stem, and it is recommended to get this as deep as possible so only the plant tip is showing above the soil.
Longer slips benefit from placing the stem partly horizontal so in a J pattern,the theory is more roots will push down for a higher yield.
Before planting out ensure the soil is warm enough, watering a few days prior and letting the soil warm.
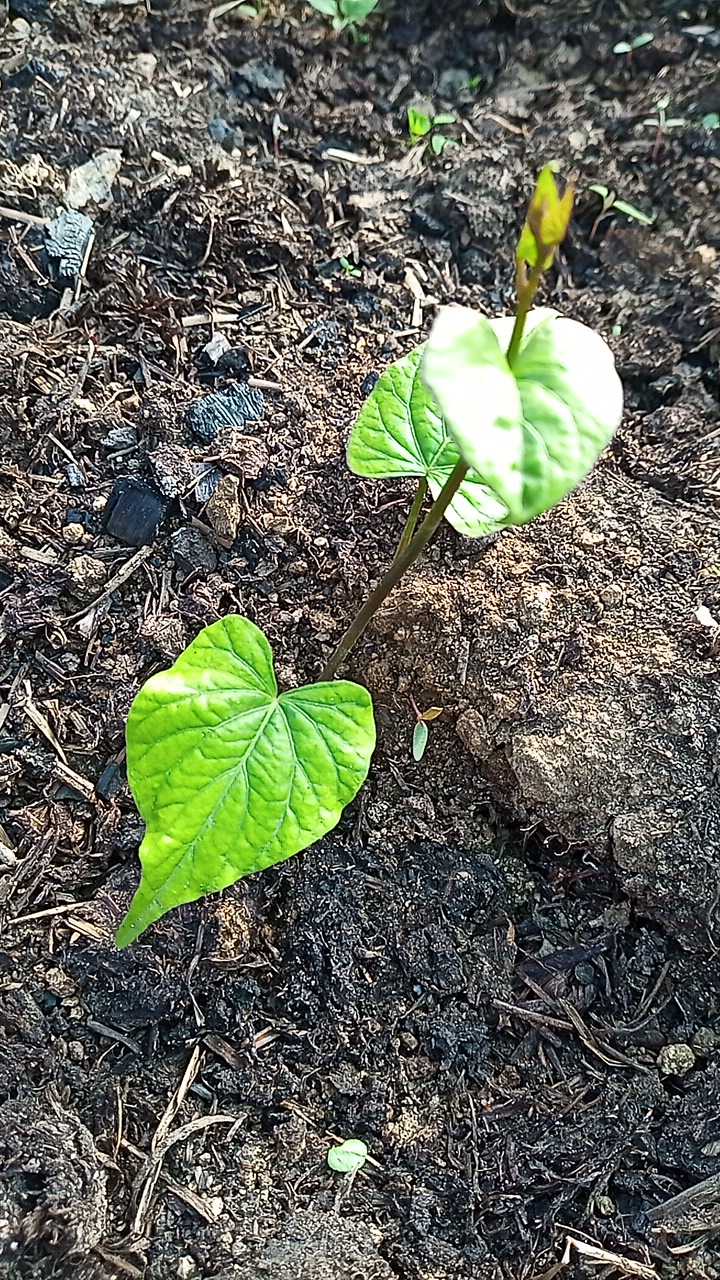
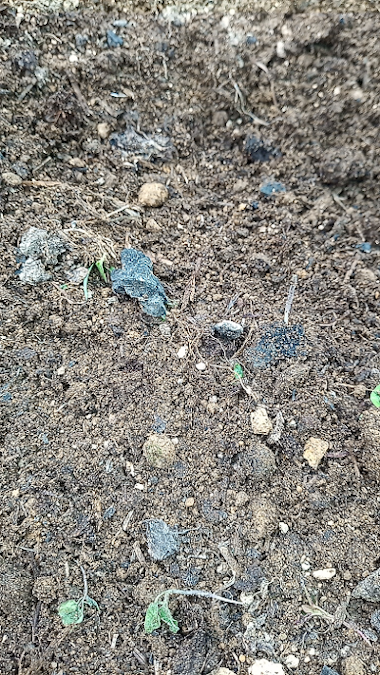
After a very short time the plant will grow as per the photo.
I plant by the moons phases, and only on Root days.
This is traditionally practiced by the New Zealand Maori and I respect that tradition. Locally in France planting by the moon phases is common and booklets are available from Gamm Vert (Garden Shop).
The biggest task until the plants mature is weed control, once a total blanket of vines forms this task can can reduced. The vines act to suppress weeds by blocking out sunlight.
Monitoring soil moisture is required if rain is not frequent.
Tuber development laterin summer requires a lot of water very similar to growing potatoes.
Some articles suggest to lift the vines to stop rootlets forming. The first year I did this, but the issue is risking standing on vines and crushing the stem. I still get a very good yield if I leave them alone.
I very much doubt commerical Kumara growers spend time lifting vines.
I get insects eating some of the leaves, but it is minimal loss and I would rather grow a spray free product.
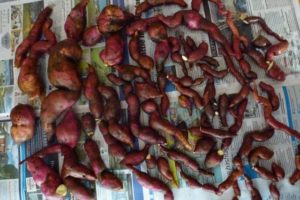
Kumara like potatoes tuber bulk later in the growing season and harvesting too early will incur a lower yield.
I wait for the first frost, shortly after that the vines decay and I cut them back leaving only a short stem.
This stem is used to locate the potential reward, and reduces digging effort. Be very careful not the damage Kumara, using hand digging is best.
Our sheep and pigs get the vines, so nothing is wasted. The first year I took cuttings and looked after the pots inside under grow lights. Its a huge effort for not alot of reward. I did it to try and conserve growing stock for the next season.
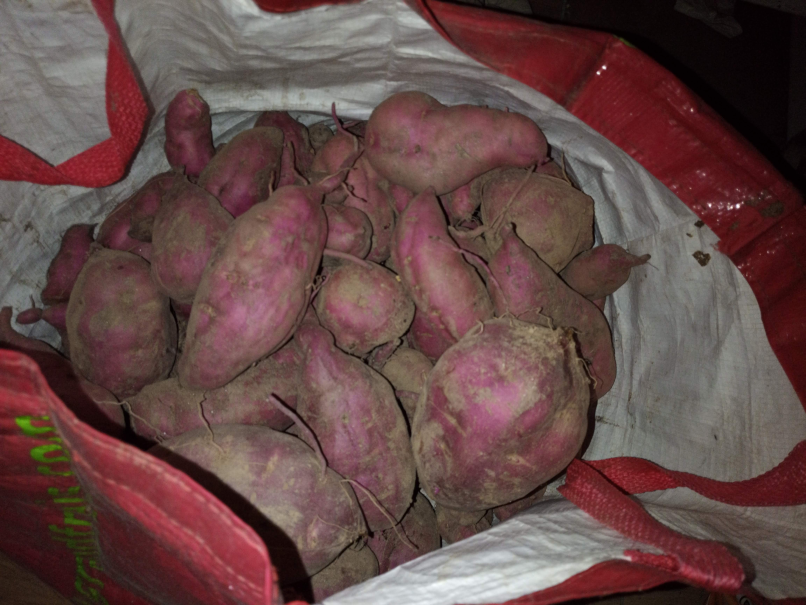
Maintaining good organic matter in the soil and moist control allows much easier harvesting.
Dry soil with low organic matter is much harder and breakage of Kumara tubers occurs.
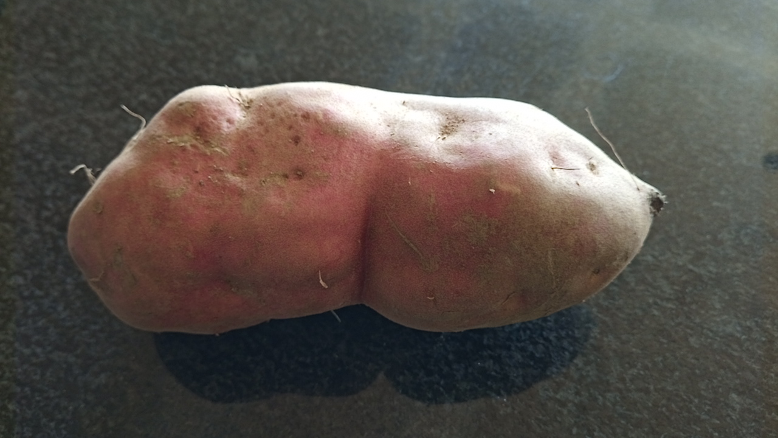
The outer skin of the Kumara (Purple colour) is very fragile and if broken reduces storage life.

Kumara unlike potato benefits from a period of curing.
Leaving Kumara on top of the soil for a few days in the sun helps toughen the skin and improves the flavour.
Warmth and Humidity helps change the starches to a more sweeter taste.
Keep a watch on the weather forecast, as sub zero temperatures will spoil the crop.
You can gently wipe off any dirt, turn the tubers during the curing period.
Kumara don't like being stored below 10 degrees Cwhich is a bit of a problem in France.
I wrap the Kumara in paper separating each tuber keeping them out of the light and store inside.
A warming of the tubers will promote shoots so moving them into warmer room in spring helps slip growth.
I have noticed Kumara that has sprouted over the winter oftenlose these shoots, so I select tubers which have only just started to show eyes emerging.
The choice of tube should not be too smallor damaged as these tendto dry out and die.
Damaged tubers can still produce a good amount of slips but riskof mould is higher. Put them in the oven and eat them.
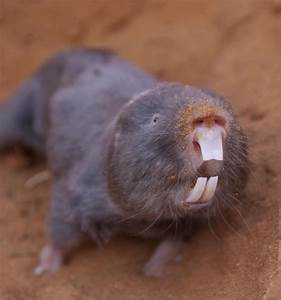
In France we have Mole Rats who love Kumara and you will lose a few.
Make sure to compensate by planting more than you need.
Half eaten Kumara are good for stock (Sheep, Pigs) and don't need cooking like potatoes.
I've yet to try a Hangi at our place, and Kumara would be the first on the list.
More to come on Cooking
While the method of placing a Kumara saved from the previous year into a glass of water suspended by toothpicks will work, there is a much more productive method.
The glass jar method may get a dozen or so slips (Tupu), while the sandbox will produce many times more Kumara shoots. You may only a few plants for your home use, but having a year round supply for your family might need a change of thought.

The sandbox Method:
1.Place approximately 50mm of sand into a plastic tray, this is enough depth for initial root development.
2. Place your Prized Kumara into the sand on its side, inspect for potential eyes (where slips start to appear) and placethis side downwards. I have found that slips that grow up through the sand have good root development and your plants will have a head start.
3. Cover most of the Kumara with seed raising mix, this helps to keep the moisture in the sand and helps root growth.
4. Water the tray with luke warm water so the sand is moist but not wet. You will need to inspect this moisture content about once per week and adjust. This can be done by drilling your finger down through the mix, and reforming afterwards.
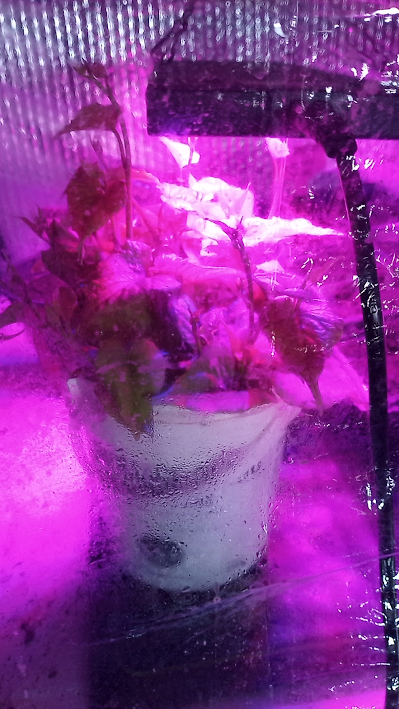
5.Place your tray onto a heat pad, with a grow light. I find once the Kumara have sprouted strongly the tray can be relocated to a sunny inside window. The initial temperature is critical, I set my heat pads to 24 degrees C and the seed raising house quickly increases to a very high humidity.
Under these conditions of temperature, light (12 hours per day) and high humidity the Kumara will come to life.
The Ka Mate Haka was composed in 1820 by a war leader of the Ngati Toa iwi (tribe) called Te Rauparaha.
He was fleeing his enemies from the Ngati Maniapoto iwi and the Waikato. He was given refuge on the shores of Lake Rotoaira at a site called Opotaka.

He hid in a Kumara pit. It was here that he was said to utter the words "Ka Mate, Ka Mate, Ka Ora, Ka Ora", continuing to compose the lyrics to the Ka Mate Haka until his pursuers never found him and when Te Rauparaha emerged from the pit and was befriended by the tribe at Opotaka. Te Rauparaha's haka was a celebration of life over death, rather than a war dance.

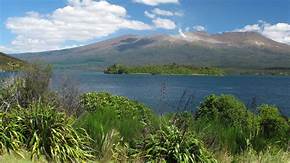
Opotaka
You can visit the very site and even the Kumara pits where the Ka Mate Haka was born at Opotaka on the road between Turangi and the Tongariro National Park on the North Island NZ. Opotaka is on the shore of lake Rotoira, immediately downhill from Lake Rotopounamu where my wife & I married.